Last week, we talked with 3D Artist Demetri Sofides about the redesign for Chrome Thumb! This week, we’re showcasing a powerful but easily missed aspect of our Paint Tool – the color picker!
Previously On RoboCo…
In a previous devblog, we introduced RoboCo’s much-anticipated Paint Tool which allows players to add color to their robot via the Paint Themes Menu or the Paint Tool. The Paint Tool itself further breaks down into three types of brushes: the theme brush, the fill brush, and the detail brush.
At the time, you could only select preset colors from RoboCo’s color palette. This palette of preset colors remains the quickest and easiest way to apply colors to your robot that will look nice in the game!
Shortly thereafter we added a full-fledged color picker to give players access to any color of their choosing, but we hadn’t covered it in a blog until now!
What is a Color Picker?
If you’ve ever opened up a design program like Photoshop, you probably know what a color picker is. For those that don’t, a color picker is a graphical tool used to select colors or color schemes. Colors are represented with a hex code, a combination of numbers and/or letters unique to a specific shade of color. For example, the hex code for the blue we use in our RoboCo logo is #69c9f3.

How Does It Work?
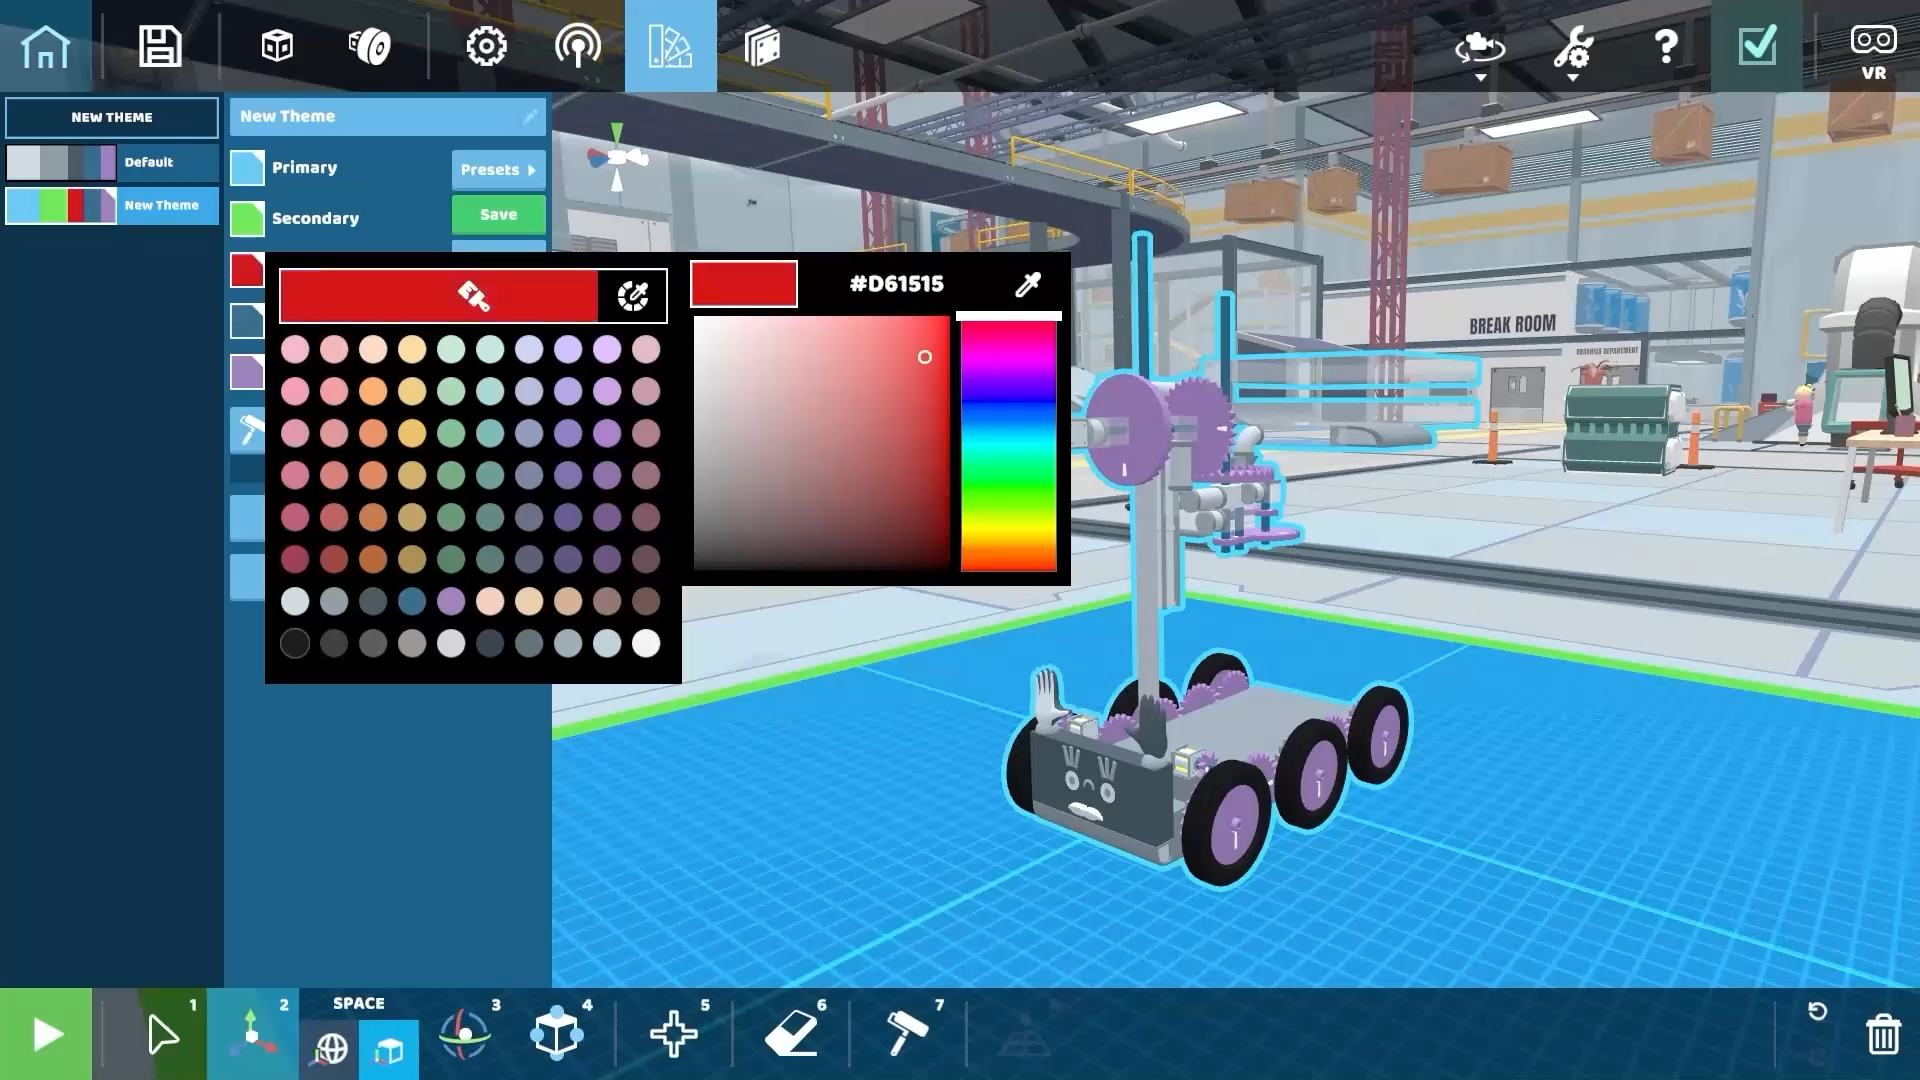
To access the color picker in RoboCo, you first need to access either the Paint Tool in the RoboCo Toolbar or the Paint Themes Menu. When you click inside the box of the color you want to change, there’s a new icon in the right-hand corner next to the brush. That icon is what you click to access the color picker.
Once you’ve entered the color picker, you have one of three options for selecting a color: the hex code, the eyedropper tool, and the color slider and field.
Using the Hex Code
If you have a specific color in mind and already know the hex code, you can input that into the color picker to obtain the specific color you want.
Using the Eyedropper Tool
If you want to grab a color from RoboCo, like the green we use for the build borders, you can use the eyedropper tool to grab colors from the environment!
Using the Color Slider
If you don’t have a hex code or nothing in the environment strikes your fancy, you can use the color slider to find a color for your robot! The slider helps you hone in on a color and updates the color field to match.
Using the Color Field
Once you’ve used the color slider to hone in on a color, you can use the color field to target the precise shade you want.
The cool thing about this tool is that, once you find the color you’re looking for, you’ll be able to copy the hex code for it too!
Saving Your Colors
If you find a color and want to use it again, make sure to save it by creating a new Paint Theme! Once you’ve determined the colors you want and assigned them to a category, you can click the green “Save” button to add it as a preset!
You can then access those presets by hitting the “Preset” button and typing in your theme’s name.
And that’s it for this week’s devblog! Are you excited to take your RoboArt to the next level? Let us know in our Official RoboCo Discord! Next week, we’ve got some more awesome parts and quirky cosmetics to unveil!
For the latest news on RoboCo, follow us on Twitter, YouTube, Facebook, Instagram, and TikTok! You can also connect with other community members and us by joining our official Discord and Reddit!
Don’t forget to add RoboCo to your Steam Wishlist!
